
SUMMARY
Very soon, all the instruments in the UChicago Chemistry NMR Facility will be equipped with autosamplers, including the manually-operated ones. Two questions may come to mind: How? Why?
How to use an autosampler in manual mode?
I’ve posted instruction sheets by 500-1 and 500-3, so you can refer to them when you’re at the instrument. There are different ways of approaching the same goal: getting the sample in to the magnet and getting it back out.
The Menu Way
In the Acquire tab, pull the Sample menu down to either:
Insert sample with sample changer (sx)
Eject sample with sample changer (sx ej)
The Command Way
In the command line, type either:
Insert: sx <sample number in the carousel>, e.g. “sx 9”
Eject: sx ej
Note: If you already have a sample in the magnet and you want to insert another, just use “sx <number of next sample>. The system will know to eject the first sample, then insert the next.
The Button Way
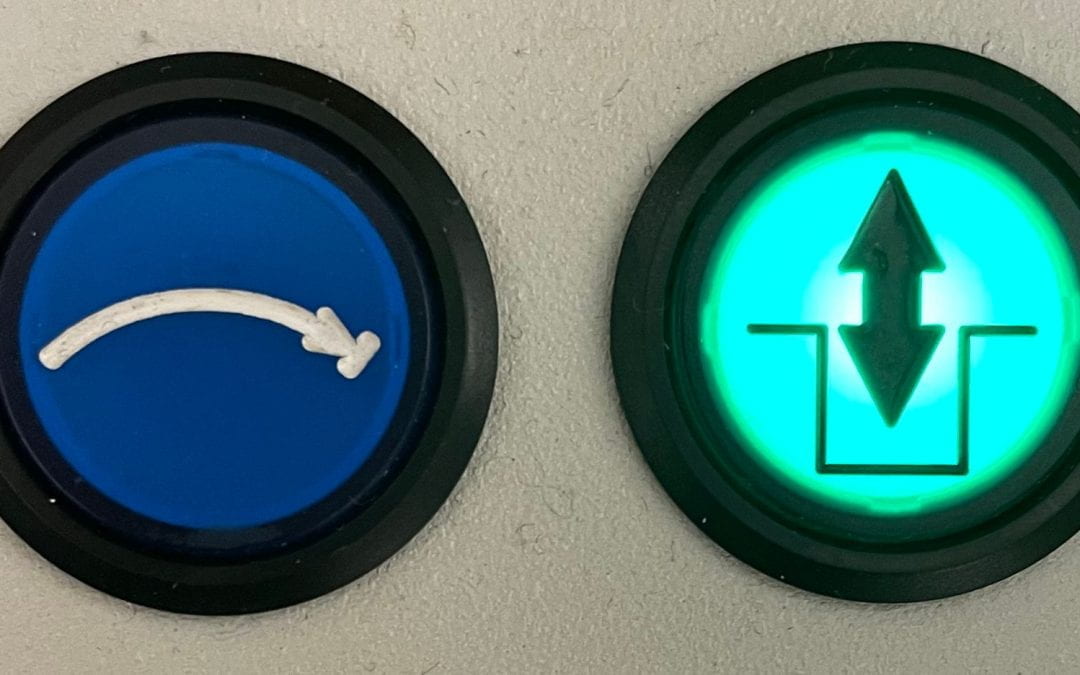
To load or eject a sample outside the software altogether, you can use these two buttons on the carousel:
Manual sample insert and eject buttons on an autosampler
The blue curved-arrow button rotates the carousel one position. The green button with the up/down arrow either loads or unloads the sample at the carousel position under the transport tube.
INSERT: 1) Click the rotate button until the sample is under the transport tube. 2) Click the green insert/eject button.
EJECT: 1) Click the insert/eject button. 2) If you can’t get your sample out safely, click the curved-arrow button to rotate the carousel so the sample can be pulled free of obstruction.
Why use an autosampler in manual mode?
When you log in and use an NMR instrument equipped with an autosampler, you have your own personal robot. There are several advantages:
- You do not have to climb stairs to use the instrument. Chemistry should not be restricted to people who can climb stairs.
- It is convenient to load from ground-level, especially if you have more than one sample. You can load all your samples into spinners at once, like you do with a fully automated instrument.
- You can now reserve time on an instrument and not be restricted by the time limits required on the fully automatic instruments. E.g., you can reserve five hours and run five samples for one hour each during the day.
- Samples are less likely to break inside the magnet. The most common way to break a sample in the magnet is accidentally snapping off the liquid-containing part of the tube below the spinner. If you aren’t operating at the top of the magnet, that can’t happen.
- You do not need to be exposed to the higher magnetic fields at the top of the magnet. Wearers of watches will no longer place them at risk of damage.
- Soon I’ll figure out how everyone with Level2 training can use IconNMR effectively. In principle, manual users should be able to log in, let Topspin start, start IconNMR, and use the instrument as if it was fully automated like the 400s, even at variable temperatures. This will take some development.
•